🚀 Installation
We provide multiple installation methods. Are you a newbie to Docker? We recommend Docker Compose for beginners. More experienced? Try out Helm Charts or TrueNas Scale.
Docker
🐋 Docker Compose
Prerequisites
- A Linux or Windows based system that meets the hardware prerequisites and architecture prerequisites.
- Docker
- Docker Compose - preinstalled on many systems nowadays
Installation
To install Homarr using Docker Compose, simply create a file called docker-compose.yml and paste the following code into it.
version: '3'
#---------------------------------------------------------------------#
#     Homarr - A simple, yet powerful dashboard for your server.      #
#---------------------------------------------------------------------#
services:
  homarr:
    container_name: homarr
    image: ghcr.io/ajnart/homarr:latest
    restart: unless-stopped
    volumes:
      - /var/run/docker.sock:/var/run/docker.sock # Optional, only if you want docker integration
      - ./homarr/configs:/app/data/configs
      - ./homarr/icons:/app/public/icons
      - ./homarr/data:/data
    ports:
      - '7575:7575'
Then, run docker compose up -d in the same directory. This will start the Homarr container in the background.
Docker compose creates a network by default. Some integrations may not work (specifically Dash.) when the network internal hostname is used since clients do not know this name. It is recommended that you either use a local network wide hostname or the IP directly. An alternative is to create a DNS record with the same internal compose stack hostname for all clients outside.
Updating
To update, navigate to the directory with the docker-compose.yaml located.
- Stop Homarr using
docker compose down - Pull the newest image of Homarr using
docker compose pull - Start Homarr again using
docker compose up -d(-dfor detached mode - start in background) - Delete the old image using
docker image prune(Warning: this also removes you other unused images - not just Homarr)
You can automate this process using Watchtower.
Uninstalling
To uninstall, navigate to the directory with the docker-compose.yaml located.
- Stop Homarr using
docker compose down - Delete the created directories & files on your root file system (check
docker-compose.yamlfile for your specific locations) - Delete compose file using
rm docker-compose.yaml - Prune unused Docker images using
docker image prune(Warning: this also removes you other unused images - not just Homarr) - (Optional): Prune any network or volumes if you use any.
- (Optional): Remove Homarr from your reverse proxy, VPNs or tunnels if you use any.
🐋 Docker Standalone
Docker is a not the recommended installation method, because Docker Compose is in many ways superior and easier to use for beginners. Continue along if you know what you're doing.
Prerequisites
- A Linux or Windows based system that meets the hardware prerequisites and architecture prerequisites.
- Docker
Installation
To install Homarr using Docker, simply run the following command.
docker run  \
  --name homarr \
  --restart unless-stopped \
  -p 7575:7575 \
  -v /var/run/docker.sock:/var/run/docker.sock \
  -v <your-path>/homarr/configs:/app/data/configs \
  -v <your-path>/homarr/data:/data \
  -v <your-path>/homarr/icons:/app/public/icons \
  -d ghcr.io/ajnart/homarr:latest
Docker will mount the configuration files and icons to your host machine. Please make sure to replace <your-path> from the docker run command with your desired storage location. The path must be absolute.
Make sure all your volumes path are pointing at different folders or the mounting will fail. Example of what NOT to do:
-v apps/homarr:/app/data/configs \
-v apps/homarr:/app/public/icons \
-v apps/homarr:/data
Instead do:
-v apps/homarr/configs:/app/data/configs \
-v apps/homarr/icons:/app/public/icons \
-v apps/homarr/data:/data
Updating
To update Homarr, you must remove your container first. Make sure that you've mounted your data and that you have access to it, so your configuration doesn't get lost.
- Run
docker rm homarrto remove the container. - Pull the latest Homarr image
docker pull ghcr.io/ajnart/homarr:latest. - Re-run the command you used to install Homarr.
This process can get tideous, if you update frequently. Thus, we recommend using docker-compose
Want to update all your containers automatically? Checkout Watchtower a service which will automatically update your containers on a set interval.
Uninstalling
- Obtain the container ID of your Homarr container using
docker ps | grep homarr. - Delete the container using
docker rm <your-container-id> - Prune unused Docker images using
docker image prune(Warning: this also removes you other unused images - not just Homarr) - (Optional): Prune any network or volumes if you use any.
- (Optional): Remove Homarr from your reverse proxy, VPNs or tunnels if you use any.
Container Management Software
💻 Portainer CE
Prerequisites
Installing
Updating
Uninstalling
💻 Portainer Stacks
Prerequisites
Installing
To install Homarr using Portainer Stacks, simply create a new stack and paste the following code into it.
version: '3'
#---------------------------------------------------------------------#
#     Homarr - A simple, yet powerful dashboard for your server.      #
#---------------------------------------------------------------------#
services:
  homarr:
    container_name: homarr
    image: ghcr.io/ajnart/homarr:latest
    restart: unless-stopped
    volumes:
      - /var/run/docker.sock:/var/run/docker.sock # Optional, only if you want docker integration
      - <your-path>/configs:/app/data/configs
      - <your-path>/icons:/app/public/icons
      - <your-path>/data:/data
    ports:
      - '7575:7575'
Portainer will mount the configuration files and icons to your host machine. Please make sure to replace <your-path> from the docker run command with your desired storage location. The path must be absolute.
Make sure all your volumes path are pointing at different folders or the mounting will fail.
Then, click on Deploy the stack and wait until the container has started.
If you're unsure how to create a stack, checkout the Portainer Documentation.
Updating
To update Homarr using Docker Compose or Portainer Stacks, simply pull the latest image and restart the container.
- Run
docker pull ghcr.io/ajnart/homarr:latestto pull the latest image. - Re-run
docker-compose up -dor re-deploy the stack in Portainer.
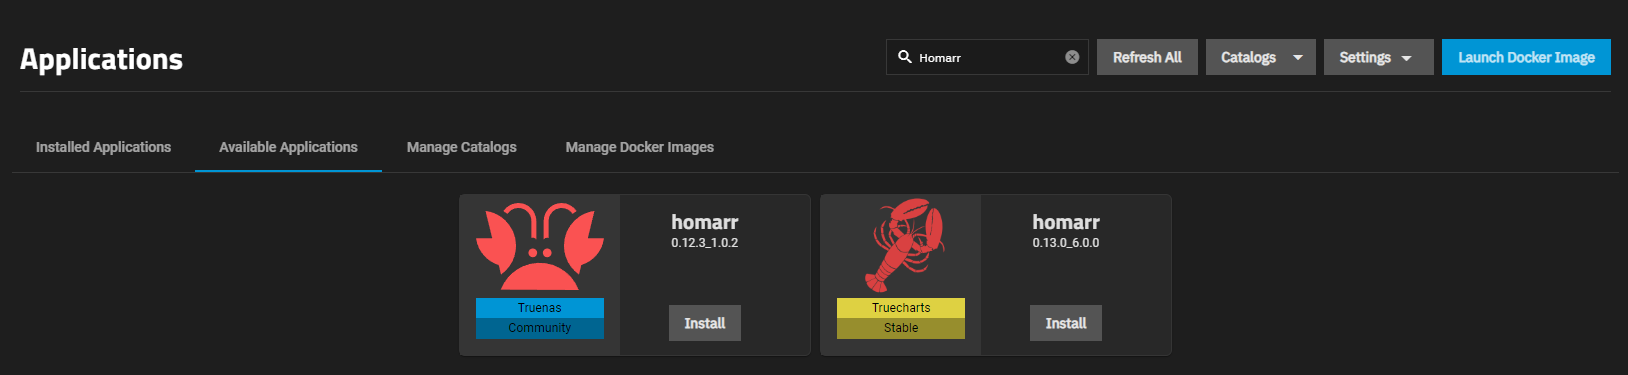
💻 TrueNas
Although Homarr is available from the Official TrueNas Scale Catalog, we recommend using the Truecharts catalog instead as they update to the latest release faster and offer more customization.
It is also recommended to make the volumes in there into HostPaths so you can access the folders easily.
Don't use the same final destination folder twice as this will cause problems.
💻 Unraid
You can install Homarr directly from your Unraid Dashboard, no terminal required.
Prerequisites
Install the Community Apps Plugin
Don't know whether you have the plugin installed or not? Search for this tab in the navigation:

Installing
After you've installed the Community Apps Plugin, you can install Homarr from the Unraid Dashboard.
- Navigate to the tab "Apps".
- Search for "Homarr" and click on the result.
- Click on "Install" and adjust the settings to your liking.
After you've installed Homarr, you can find it under the tab "Docker".
The official support thread is located here, but we prefer to communicate over GitHub and Discord instead.
💻 Synology
The installation process is quite easy and fast on Synology devices. Since this method is used less often, we recommend you to follow this guide written by mariushosting.
https://mariushosting.com/how-to-install-homarr-on-your-synology-nas/
💻 QNAP
When installing on QNAP, we recommend you to install Homarr using Container Station or this third-party image.
There is also a guide available, but note that it is written in Chinese: https://post.smzdm.com/p/awzm7op2/
💻 Saltbox
You can also use this to install on Saltbox:
sb install sandbox-homarr
💻 EasyPanel
Easypanel is a modern server control panel. If you run Easypanel on your server, you can deploy Homarr with 1 click on it.

Kubernetes
Helm Chart
Helm is a package manager for Kubernetes, easing deployment of applications like Homarr. The Helm chart for Homarr simplifies its deployment on any supported platform by Kubernetes, enabling efficient scaling and management.
Prerequisites
Installation
To install Homarr using Helm chart, please follow this steps.
- OCI (Recommended)
- Traditional
helm install homarr oci://ghcr.io/oben01/charts/homarr
helm repo add oben01 https://oben01.github.io/charts/
helm repo update
helm install homarr oben01/homarr
Example using override values :
helm install homarr oci://ghcr.io/oben01/charts/homarr --namespace homarr --create-namespace --values=override.yaml
image:
# Overrides the image tag whose default is the chart appVersion.
  tag: "0.14.2"
ingress:
  enabled: true
  className: "traefik"
  annotations:
  # Add any additional annotations as needed
  hosts:
    - host: homarr.homelab.dev
      paths:
        - path: /
          pathType: ImplementationSpecific
  tls:
    - hosts:
        - "homarr.homelab.dev"
        - "www.homarr.homelab.dev"
      secretName: homelab-tls
All available values are listed on the artifacthub. If you find any issue please open an issue on github
Uninstalling the Chart
To uninstall the homarr deployment
helm uninstall homarr
The command removes all the Kubernetes components associated with the chart including persistent volumes and deletes the release.
(Not recommended): From source
Installing from source is a bad idea in many ways:
- No isolation between applications
- Dependency conflicts on your root operating system
- Cumbersome update process
- Permission management
- Handling of conflicts
Therefore, we highly discourage you from using this as a normal user. This method is only useful, when you want to develop on Homarr or extend it with your own functionality.
- Yarn Package Manager
- NPM Package Manager
- Clone the Repository using
git clone https://github.com/ajnart/homarr.git - Enter the created directory using
cd homarr - Install all dependencies using
yarn install - Copy the
example.envfile to.env - Build the source using
yarn build - Run
yarn db:migrateand wait that it completes - Start the NextJS web server using
yarn start - Alternatively, use
yarn devto run a live development server.
- Clone the Repository using
git clone https://github.com/ajnart/homarr.git - Enter the created directory using
cd homarr - Install all dependencies using
npm install - Copy the
example.envfile to.env - Build the source using
npm build - Run
yarn db:migrateand wait that it completes - Start the NextJS web server using
npm start - Alternatively, use
npm run devto run a live development server.
Home Assistant Add-on
Homarr can be seamlessly integrated into your Home Assistant setup with this add-on. This is perfect for users who rely on Home Assistant as their primary server and don't have a separate device for hosting.
Prerequisites
- Home Assistant
- Add-ons are only available if you've used the Home Assistant Operating System or Home Assistant Supervised installation method.
Installation
-
Add Repository: Navigate to your Home Assistant Supervisor panel, and go to the Add-on Store. Add the following repository URL:
https://github.com/Wiggen94/ha-homarr-serveror click this button
-
Install the Add-on: Search for "Homarr Server" in the Add-on Store and select it. Click on "Install" to start the installation process.
-
Start the Add-on: Once installed and configured, start the Homarr Server add-on from the Home Assistant Supervisor panel.
-
Access Homarr: Homarr will be available at
http://<your-home-assistant-ip>:7575. Open this address in your browser to access your Homarr dashboard.
Your configuration, data and icons will be saved at /shares